SIP Trunking - Register Method
SIP Trunks that use the registration method require authentication from the pilot number on the trunk.
There are two configuration options when setting up a 2talk Register Trunk
1. Account Level Register Trunks
Enables trunk registration at the account level. Once this configuration is applied, all voice numbers associated with the account will automatically link to the registered pilot number, including any numbers added in the future.
2. Line Level Register Trunks
Enables trunk registration at the line level. This configuration requires separate setup for each additional number you wish to connect to the trunk.
Account Level Register Trunking
Select the Pilot Number in the Cloud PBX
Under "Preferences" -> "Register Trunking" tick 'Enable register trunking on this account making this number the pilot' and click "Save"
All voice numbers on the account will automatically latch to the registered pilot

Options
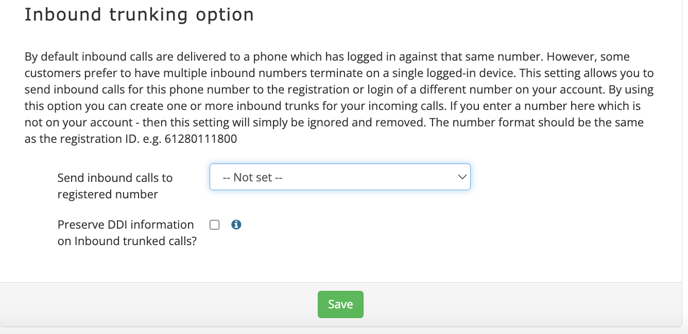
- Preserve DDI information on calls to trunk: Preserves the dialled number in inbound CLI presentation. Please check your PBX can support multiple DDIs on a single registration before enabling
- Enable outbound trunking on this line: Allows outbound presentation of other phone numbers as Caller ID on your registered trunk without having to register each of those numbers. Recommended if you wish to present individual DDIs externally.
Notes:
Removing the pilot from the account will remove the associated register trunk. New logic will need to be configured for any remaining numbers.
After you’ve enabled outbound trunking in the portal you can present another number on the account as your Caller ID by configuring your PBX to send the SIP headers described in the Registered Trunk section of 'SIP Trunking - Outbound Caller ID'.
Line Level Register Trunking
There are two steps to setting up a register trunk at line level.
Step One: Inbound Trunking

Step Two: Outbound Trunking
Select Pilot Number in the Cloud PBXAfter you’ve enabled outbound trunking in the portal you can present another number on the account as your Caller ID by configuring your PBX to send the SIP headers described in the Registered Trunk section of 'SIP Trunking - Outbound Caller ID'.
Notes
- Display name: Most devices such as soft phones and IP Phones refer to the name part as the Display name.
- Asterisk based PBX systems the name part can be set in the SIP or IAX2 configuration with the callerid= field – or if you wish to present it in the dial plan then you use the CALLERID (name) variable. By changing this name part to the number you wish to present on the call you can achieve multiple caller ID presentations for each DDI over a single registration or login.
- P-Asserted-Identity: see also a P-Asserted-Identity header (RFC 3325) to define the Caller ID as an alternate to manipulating the name field (subject to your system support for RFC 3325).
